
Breakfast Nook on a Budget

Okay, so it’s not really a “nook”, but it IS a super cute place to enjoy some breakfast and a coffee! If you live in a small apartment with nowhere to sit down and eat, you might be able to carve out a little area by defining the space and using multi-purpose furniture. Want to give it a shot? Let’s get into it!
Work with What You’ve Got
This area was a total eyesore when we moved into this basic (but newly renovated) 1973 apartment. A skinny little wall (the closet) separated the entryway from the kitchen, and the side of the stove was exposed (maaajor faux pas!).
We needed more prep space, but since the little kitchen is squished into the corner of the apartment, we had to extend the work surface out into the “dining space”. Since Jake and I both need “office space” at home, the eating area couldn’t go at the end of the extended kitchen either, since this was the only place for our desks.
That left the awkward lil’ closet wall to transform into an eating area, but that was fine by me since it otherwise would have been wasted space, and you can’t waste space in a 600sf apartment!

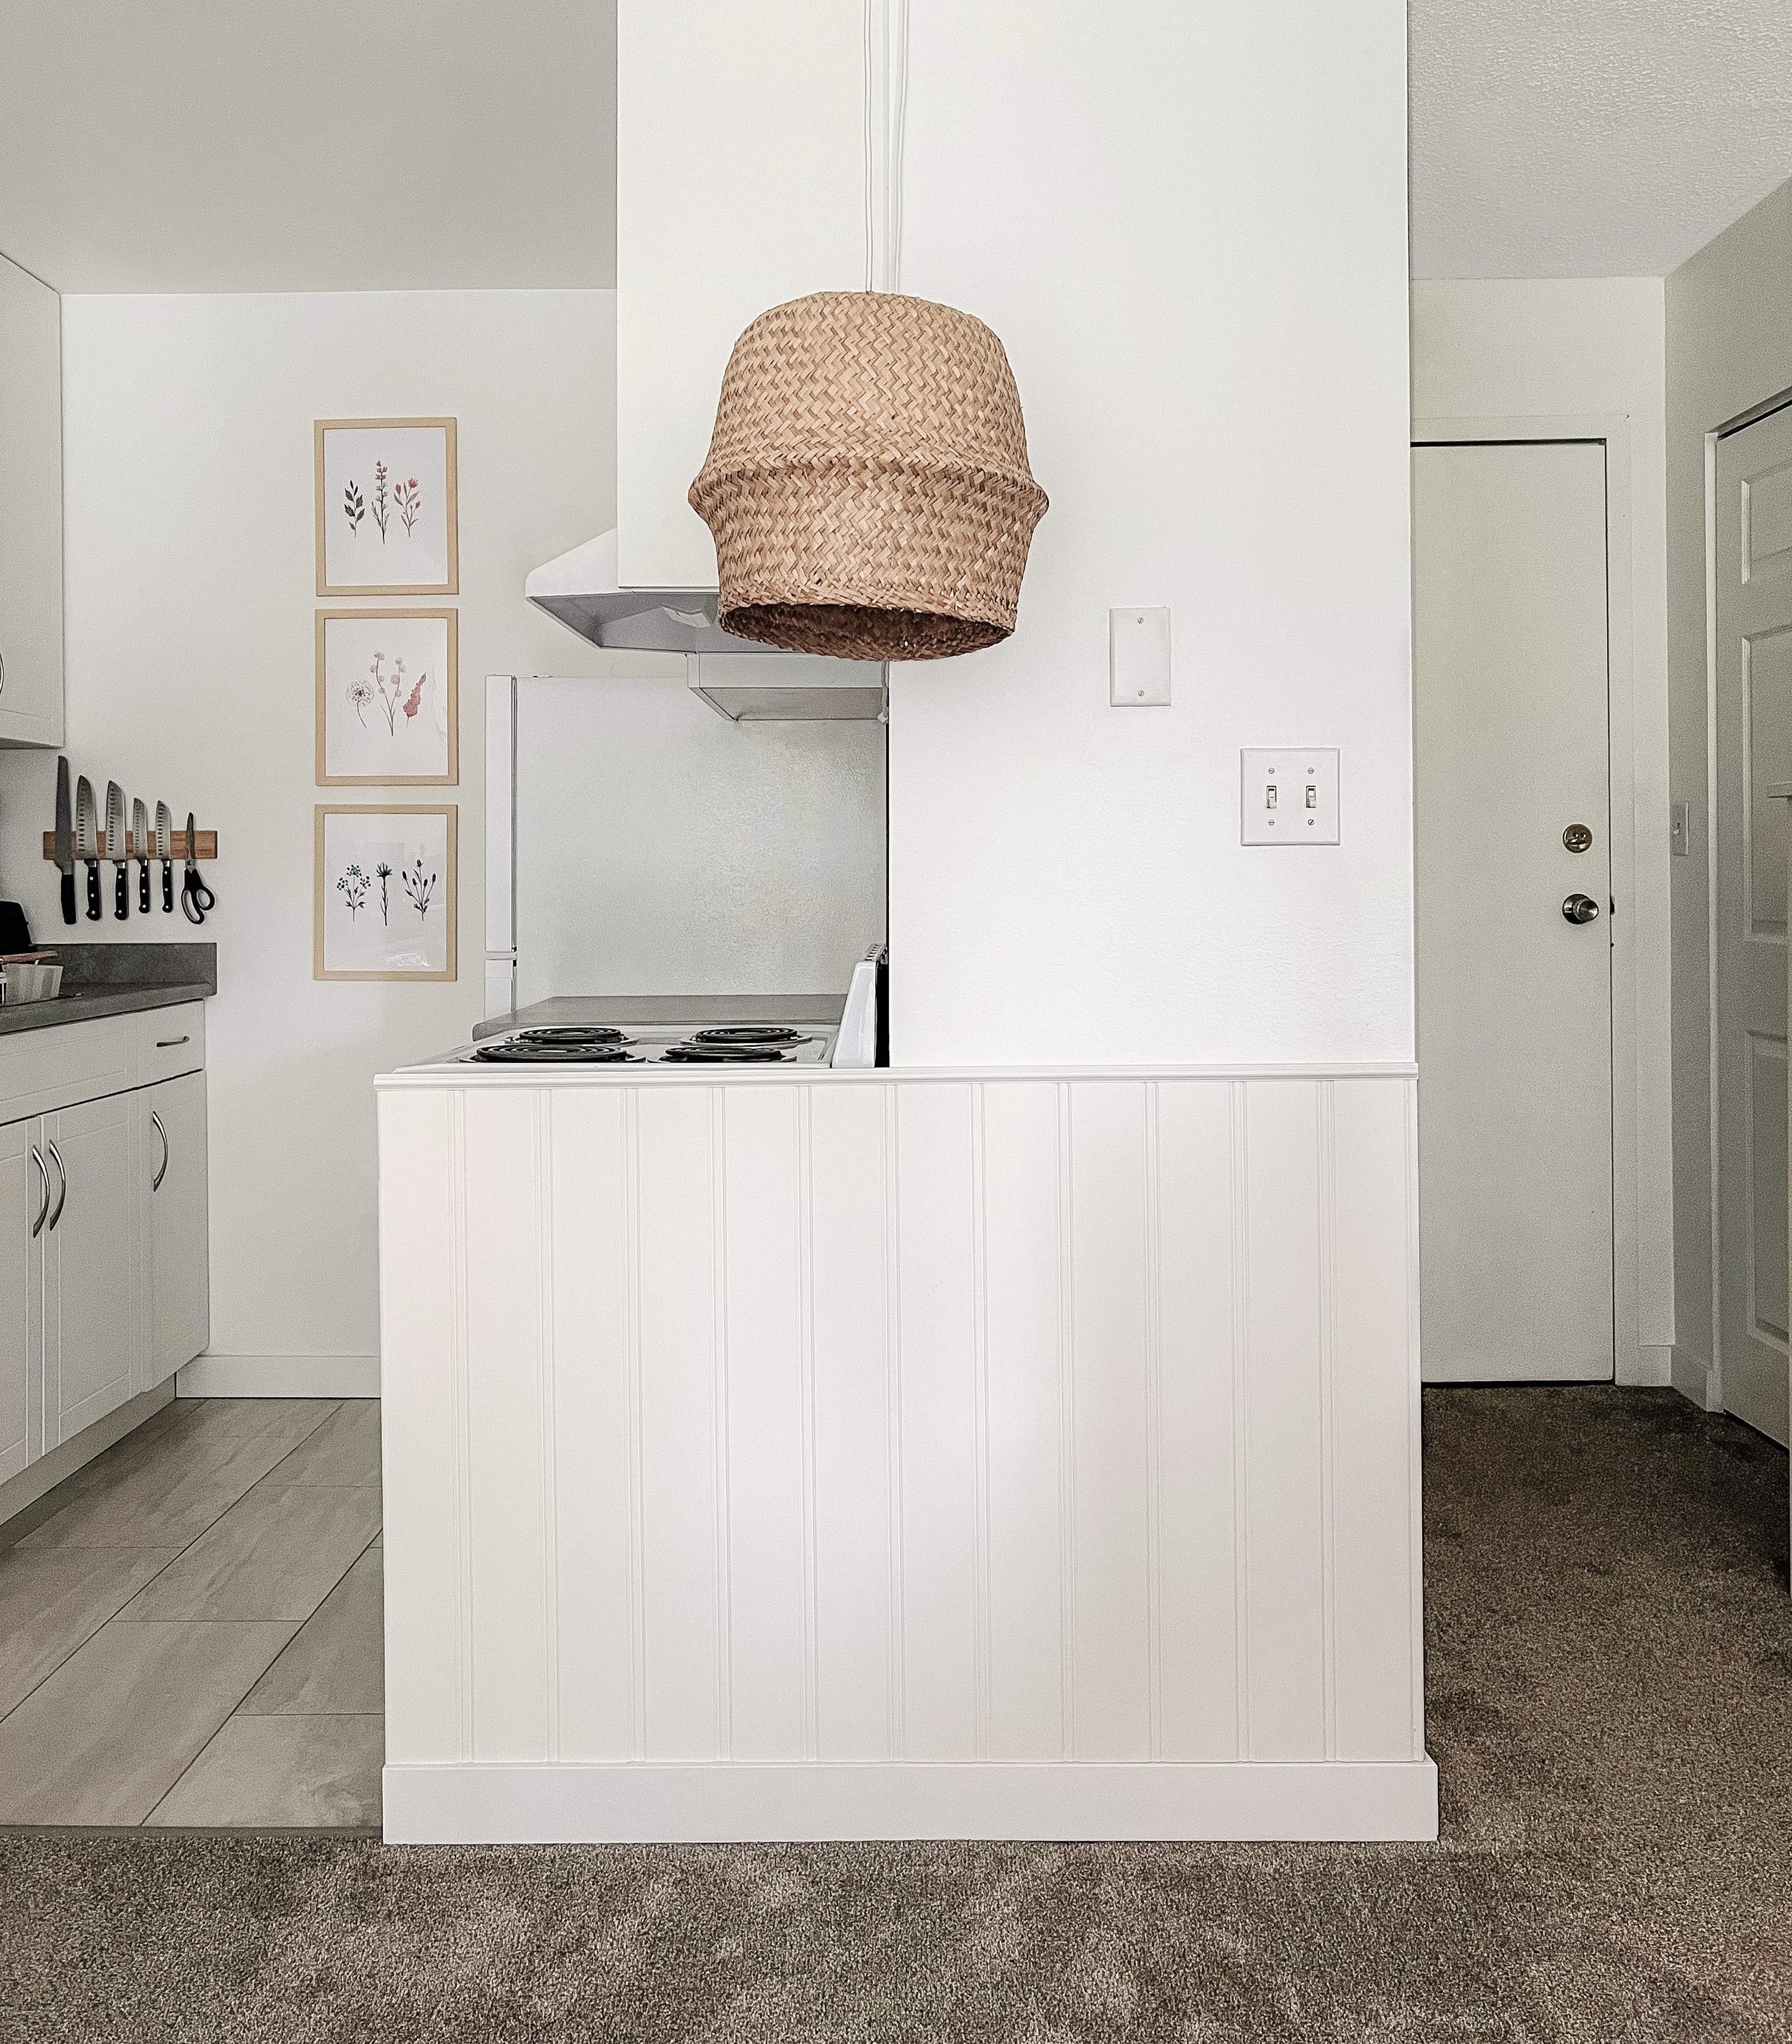
BEFORE | Original state of the closet wall and exposed stove.
Step 1: Define the Space
When you’re trying to create different zones within an open layout, you need to define the space. This can be done many ways, but in this case, a proper backdrop and simple pendant light did the trick!
The Backdrop
That stove needed to be covered up. After considering decorative panels and garden lattice, I eventually found this perfect piece of beadboard from Home Depot. Panelling is handy for small spaces because it’s often sold by the sheet, so you can buy as little as you need ;).
First I extended the baseboard with a small matching piece from Rona. Baseboard is sold by the foot, so all you have to do is measure your existing baseboard, find a match from your local home improvement store, and cut off what you need right there in the store!
I attached half the beadboard to the wall using finishing nails, which are strong enough to hold it in place but won’t cause any damage. The other half simply floats in front of the stove, lightly supported by the baseboard underneath.
Janky? Lil’ bit. Improvement? DEFINITELY!
The Lighting
Lighting is another great way to define zones. Pendants always looks nice over a table, but there’s rarely a junction box righttt where ya need one!
Enter: the plug-in pendant light - a genius little apartment trick. Simply plug the cord into a wall socket, mount the light with a ceiling hook, and VOILA , you have a perfectly placed pendant light! The only trouble is they can be sooo dernnn expensive...
Enter instead: the pendant light cord. Rather than buy the whole fixture, I purchased a cord and woven basket separately, then DIY’d the shade! Did it turn out just like the beautiful woven options I was pining over? Definitely not. But it was quick, easy, and wayyy less expensive, so I still consider it a win.
The fabric wrap on this cord is a nice touch, helping it look more finished and blend better with the walls. If you want a more decorative cord to wrap around a brace or bar, you could use something like this twisted cord with wood detail.
Whichever cord you choose, don’t forget to measure carefully and select the right length!


Phase 1: Define the Space complete!
Step 2: Source the Furniture
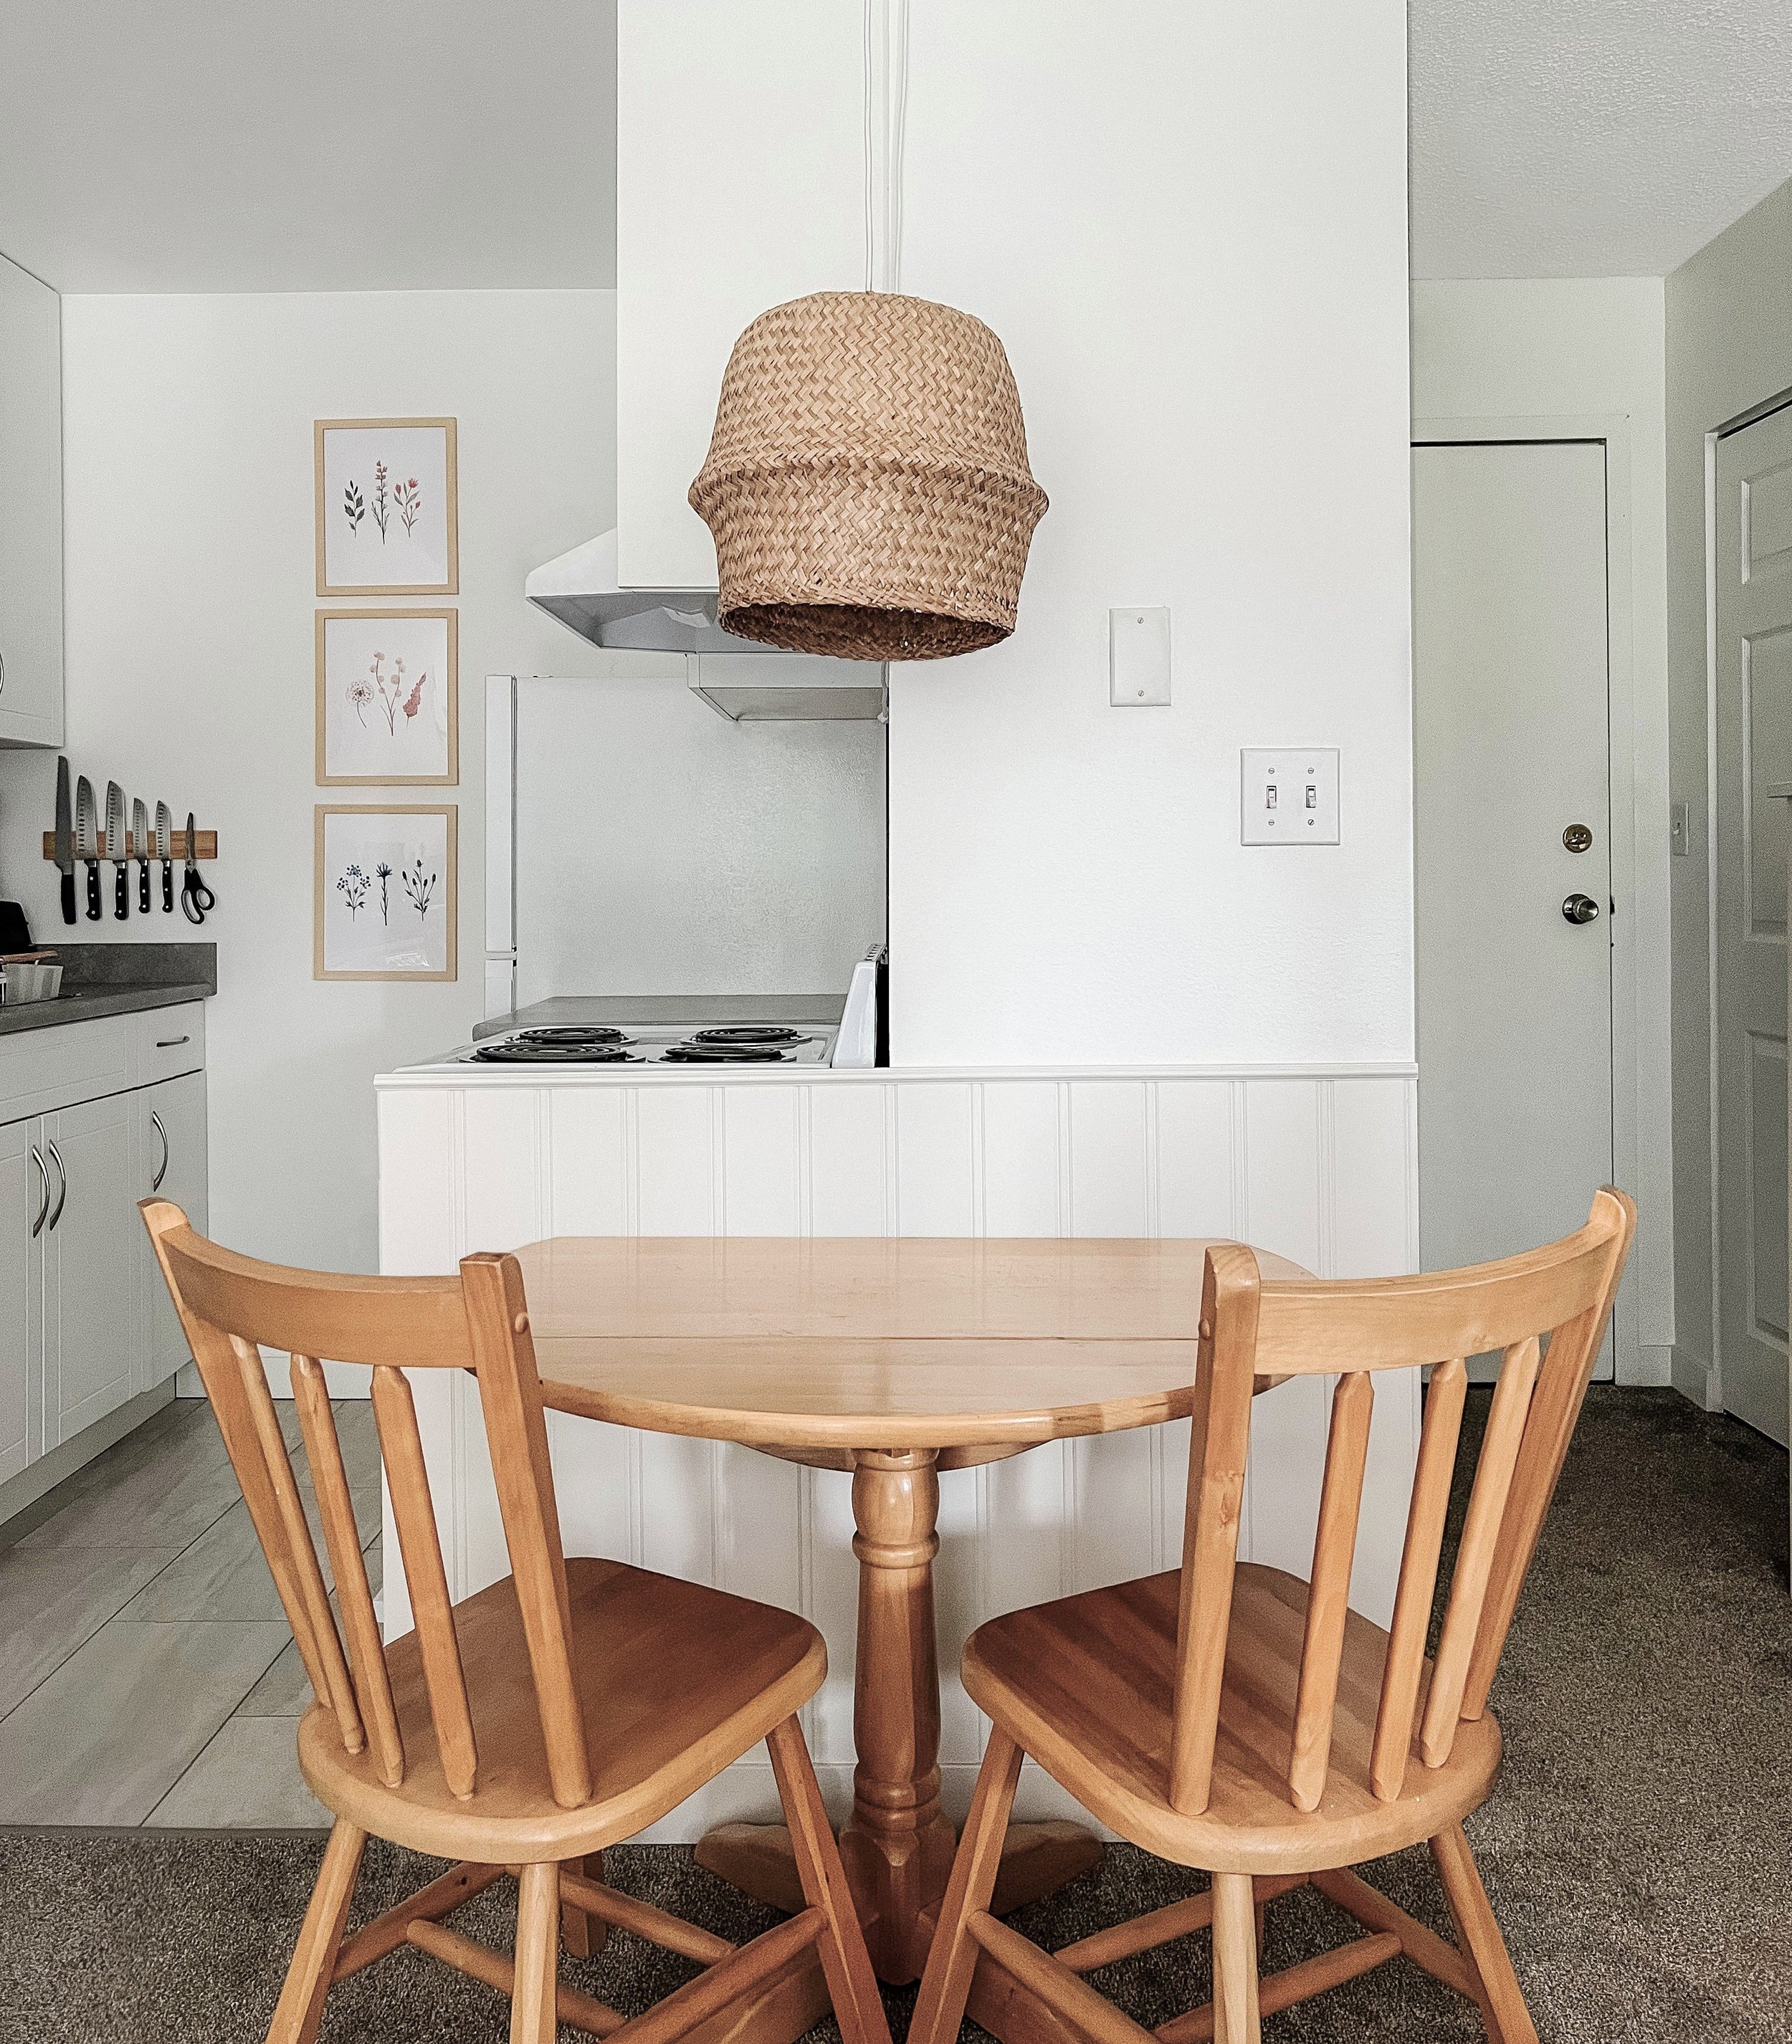
Convertible tables are great for small spaces. They can stay collapsed and out of the way most of the time, but can easily be extended for guests. During your search, use terms like “extendable” or “drop-leaf” tables. IKEA often has a good selection of space-saving furniture, but it’s always worth checking second-hand marketplaces and thrift stores first. We scooped up this drop-leaf table + chairs at our local ReStore for about $150!
Phase 2: Source the Furniture complete!
Step 3: Add Functional Styling
At this point, the eating area is mostly complete, but a little styling can go a long way! I always think it’s worth taking the extra time to find beautiful, functional pieces that contribute to your decor while ALSO serving a purpose.
After searching high and low, I found these placemats on Amazon and bought them in the colour “cream and beige” (they’re actually a lovely muted coral). These don’t seem to be available anymore, but if you search something like “round cotton boho placemats”, there are lots of other pretty options out there!
For some greenery, I love fresh flowers as much as the next gal, but they’re expensive and tedious to maintain. Instead I opted for a pretty house plant (in this case, a weeping fig) in a beautiful ceramic planter. Greenery is a foolproof way of adding beauty and texture to any space!
As for the other items: I found the utensil holder and gold watering can at HomeSense, and bought the hat at a little store on holiday. It went up on the wall not only as decor, but also because (A) It is now stored conveniently near the door, and (B) it expertly hides the light switch. ;)


And that’s a wrap! You can almost always make something out of nothing by defining your space, choosing the right furniture, and adding a little flare.

BEFORE

AFTER


